

Table of Contents
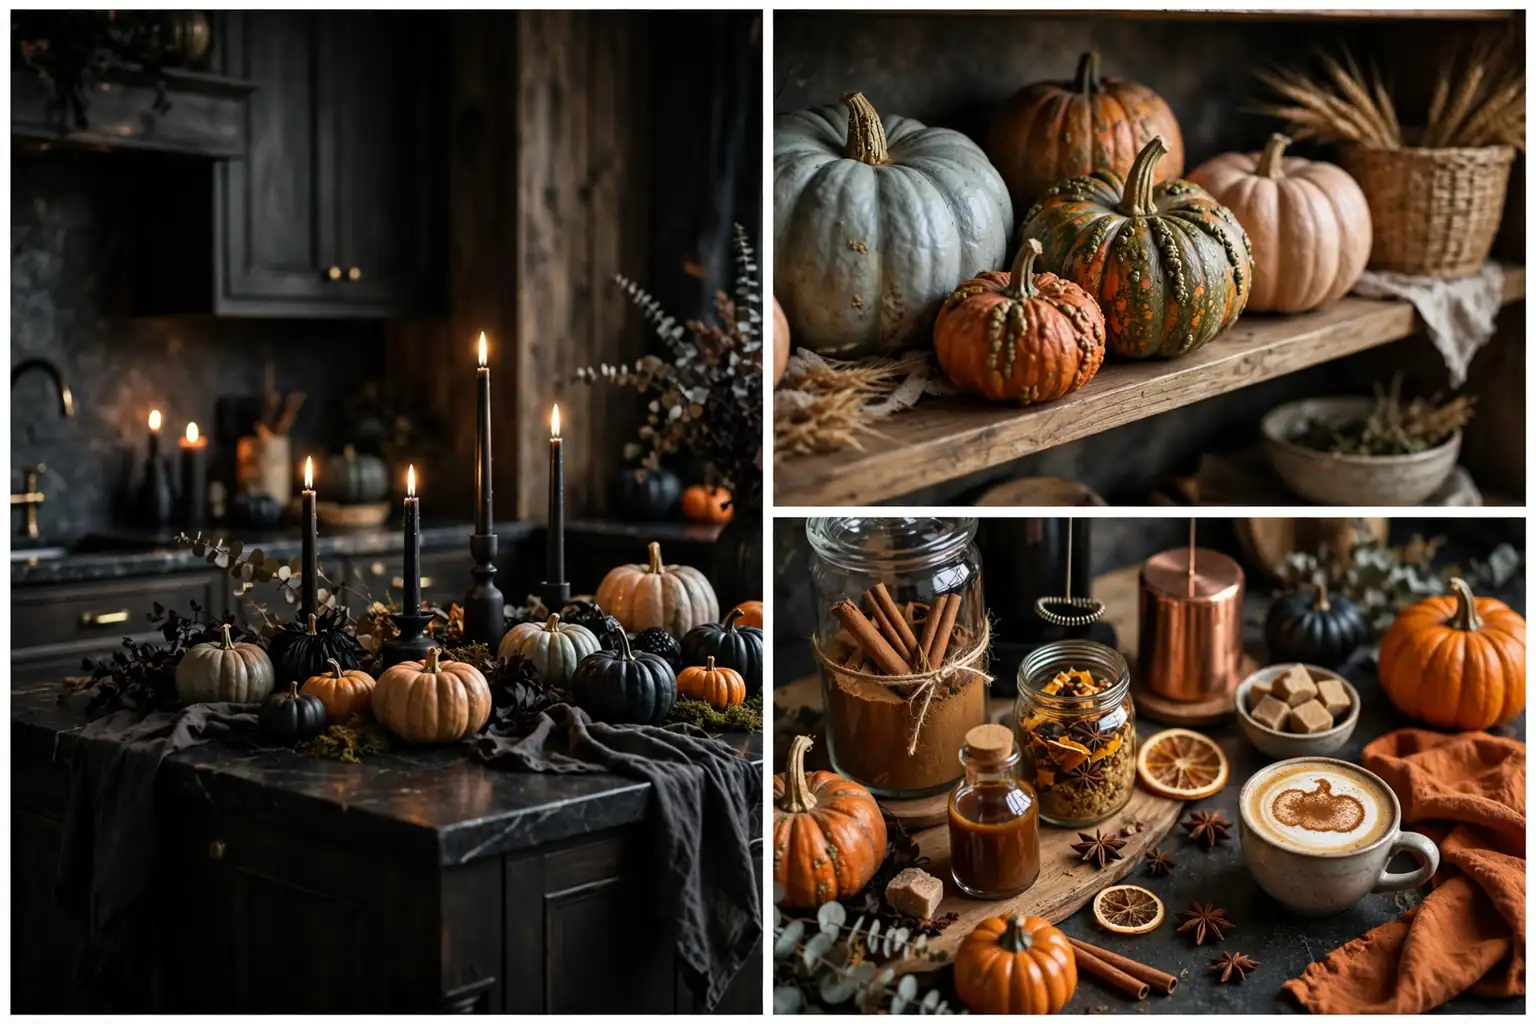
The kitchen is the true heart of the home, especially in October when the air turns crisp and everyone drifts toward warm ovens and simmering pots. These halloween kitchen decor ideas prove that the hardest working room in the house can also be the most bewitching, without turning your counters into a costume shop. Think moody candlelight on the island, heirloom style pumpkins lined along open shelves, and just enough gothic drama to make your morning coffee feel like a potion.
The trick is styling the spots you already use every day. Open shelving, the range hood, the window sill over the sink, and even the fridge door are all ready made stages for seasonal vignettes. This guide walks you through 15 distinct halloween kitchen decor ideas, each tied to a specific kitchen zone, so the whole room feels intentional instead of cluttered. If orange and black feel too loud for your taste, our pink halloween decor ideas offer a softer, playful take on the season, and interior designer Melanie Lissack’s elegant Halloween decorating ideas prove that spooky can absolutely stay sophisticated.
Before you shop or start styling, decide on one mood for the room and carry it through every vignette. A single, clear direction is what separates magazine worthy halloween kitchen decor ideas from a pile of random props. The planning table below helps you pick a lane based on the atmosphere you want and the effort you can spare. That single echo is what makes halloween kitchen decor ideas feel like a designed scheme instead of scattered props.
Planning Your Halloween Kitchen Decor Ideas: Pick a Mood First
Every strong seasonal room starts with a decision about mood. Cozy farmhouse Halloween looks nothing like gothic glam Halloween, and mixing both in one kitchen is how counters end up looking chaotic. Choose one row from the table, shop or gather only pieces that fit it, and repeat the same two or three colors in every vignette you build. For more inspiration while you plan, browse the Apartment Therapy Halloween collection to see how designers layer spooky style across real homes, and peek at our halloween mantel decor ideas for layering tricks that translate beautifully to shelves and islands.
| Style approach | Mood it creates | Effort level | Signature pieces |
|---|---|---|---|
| Cozy farmhouse | Warm, nostalgic, family friendly | Low | Heirloom pumpkins, linen runners, wood trays |
| Gothic glam | Moody, dramatic, grown up | Medium | Black taper candles, brass, dark florals |
| Playful spooky | Fun, kid approved, colorful | Low | Smiling jack o lanterns, bats, candy jars |
| Minimalist chic | Calm, curated, modern | Low | White pumpkins, black ribbon, one statement piece |
| Witchy apothecary | Mysterious, vintage, storybook | Medium | Labeled jars, dried herbs, aged glass |
Once you have your mood, coordinate with the rest of the house. Your halloween porch decor sets the first impression, so echo at least one color or motif from the porch inside the kitchen for a pulled together feel from curb to cooktop.
1. Open Shelving Styled with Heirloom Pumpkins and Apothecary Jars
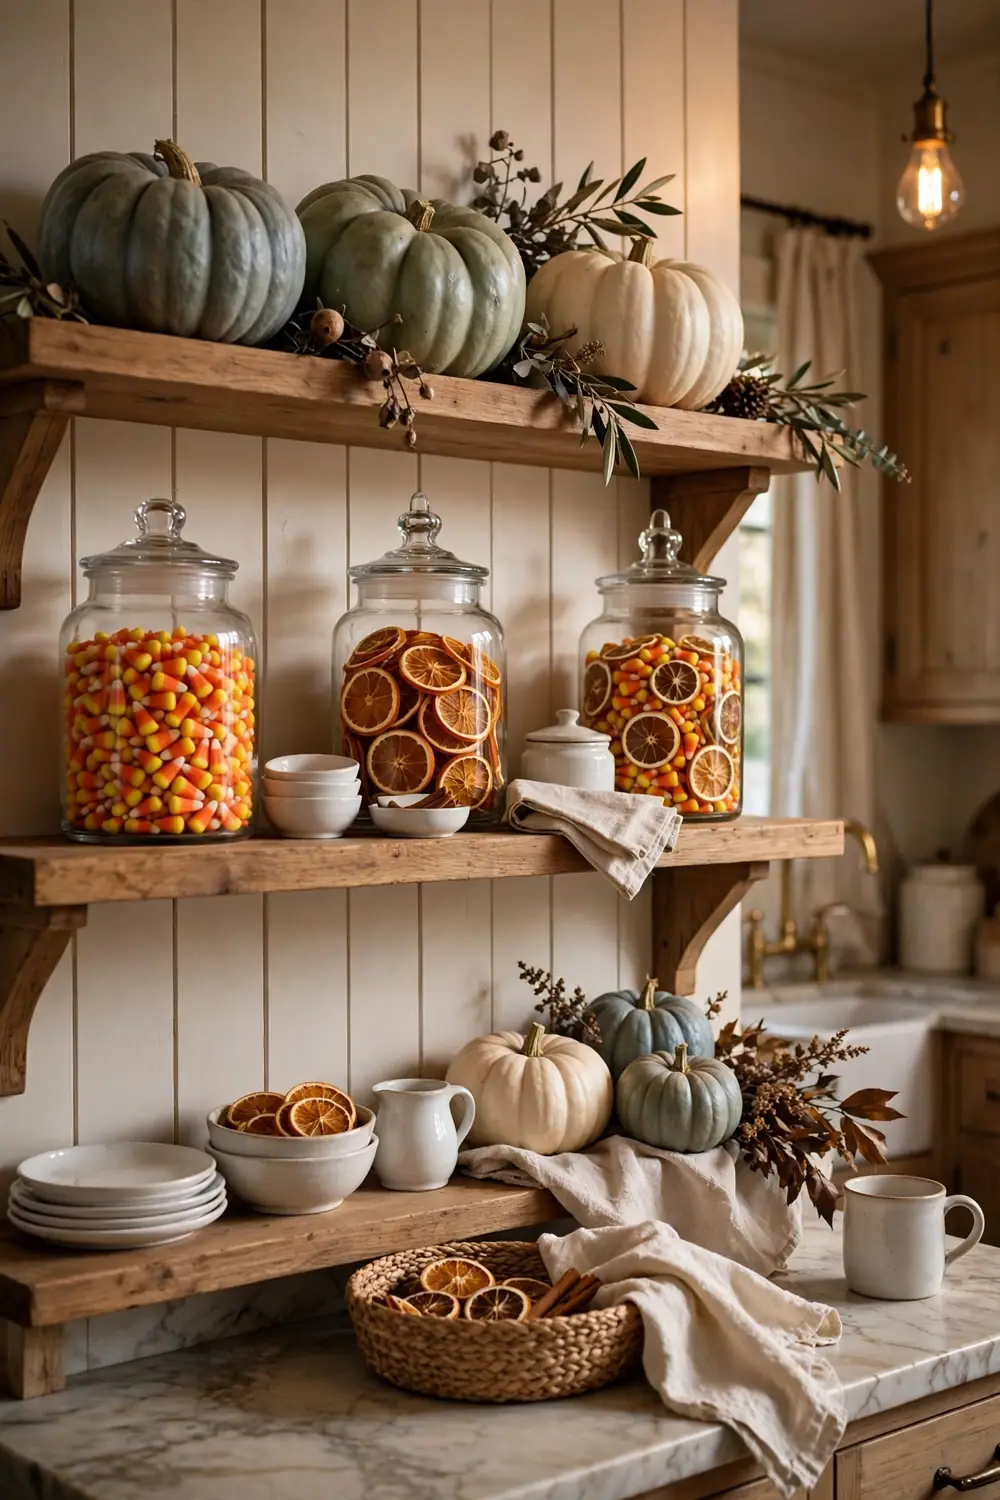
Open shelves are the easiest Halloween canvas in any kitchen because they are already styled; you are simply swapping the everyday for the seasonal. Start by editing each shelf down to about two thirds of its usual contents, then rebuild with a rhythm of pumpkin, jar, and breathing room. This is one of the most photographed halloween kitchen decor ideas because it reads beautifully from across the room.
Mix real heirloom pumpkins in dusty blue, sage, and cream with a few glass apothecary jars filled with candy corn, black beans, or dried orange slices. The glass catches light and adds height without visual weight. Keep your everyday white dishes in the mix, since white is the perfect quiet backdrop for saturated fall color. This styling works on any cabinet finish, but it is especially striking against dark cabinetry, similar to the contrast ideas in our white oak and black kitchen ideas.
Styling tips:
- Style in odd numbered groupings, three or five items per cluster, for a natural, collected look.
- Place a small LED tea light inside one jar per shelf so the display glows softly at night.
- Leave one shelf mostly empty or purely functional so the kitchen still feels usable.
- Dust shelves and wipe jars before styling, since shelf vignettes sit at eye level.
2. Kitchen Island Candlelit Centerpiece
The island is the social center of the kitchen, so it deserves the biggest Halloween moment in the room. Anchor the whole display with a long, textured runner; cheesecloth, gauze, or a black lace runner all work and cost almost nothing. Down the center, run a line of black taper candles in mixed height brass or matte black holders, interspersed with clusters of mini pumpkins and gourds.
Keep the footprint narrow, no more than a third of the island’s depth, so you keep real prep space on both sides. A low wooden tray or dough bowl underneath the arrangement corrals everything into one deliberate composition and makes the whole thing liftable when you need the surface. Flameless taper candles are the smart choice here because the island sees constant traffic, chopping, homework, and coffee refills.
This centerpiece becomes the room’s focal point after dark, especially with the kitchen’s main lights dimmed. Few halloween kitchen decor ideas photograph as well after dark as a candlelit island. If your island has bar stools, drape a throw blanket with a subtle Halloween pattern over one of them to pull the look around the seating side too.

Styling tips:
- Use flameless candles with timers so the display lights itself every evening.
- Vary pumpkin sizes from fist sized to palm sized for a gathered, organic feel.
- Keep the arrangement under 12 inches tall at its highest point so sightlines stay open.
- Tuck a few eucalyptus sprigs between pumpkins for color contrast and a fresh scent.
3. Range Hood Garland with Eucalyptus and Mini Pumpkins
The range hood is an overlooked vertical surface that frames the whole cooking zone. A garland draped along its front edge or lower trim draws the eye upward and makes the kitchen feel dressed for the season in one move. Start with a base of faux eucalyptus or preserved oak branches, then wire in mini pumpkins, pinecones, and a few black paper bats.
Because the hood sits above heat and grease, choose materials that are wipeable or cheap to replace. Faux greenery, plastic pumpkins, and paper bats all survive the cooking zone better than dried flowers. Secure the garland with removable adhesive hooks on the hood’s side edges rather than the hot front panel, and keep all draping well above the burners.
For evening drama, weave a strand of warm white fairy lights through the garland. The glow against the hood’s metal or wood finish looks high end, and it turns the cooking zone into a backdrop for October dinner parties without any extra effort.

Styling tips:
- Measure the hood width first and build the garland 6 inches longer so the ends drape softly.
- Stick to faux or plastic botanicals near the cooktop for heat and grease resistance.
- Use battery fairy lights with a timer so you never have to reach up to switch them off.
- Anchor heavier pumpkins with floral wire so nothing slides when the range fan runs.
4. Halloween Bar Cart Turned Potion Station
A bar cart is the perfect Halloween project because it is already a display piece waiting for a theme. Restyle yours as an apothecary style potion station: line the top tier with vintage style glass bottles filled with colored water, each labeled with names like nightshade syrup, pumpkin elixir, or bat wing bitters. Parchment style labels tied with twine sell the effect instantly.
On the lower tier, stack coupe glasses, a black shaker, and a small bowl of blood orange slices or blackberries for garnish. A mini chalkboard with the night’s signature cocktail written in chalk handwriting turns the cart into party decor and a functional bar at once. Add a small cauldron style ice bucket and you are done.
Roll the cart wherever the action is, near the island for prep night cocktails or beside the dining area for a party. When Halloween ends, the bottles wash out in minutes and the cart returns to normal, which makes this one of the lowest commitment halloween kitchen decor ideas on the list.

Styling tips:
- Use food coloring and water in bottles for safe, cheap, endlessly reusable potions.
- Print labels on kraft paper and age the edges with a damp tea bag for a vintage look.
- Keep one shelf practical with real glassware so the cart stays functional.
- Add a small strand of purple fairy lights around the cart frame for nighttime glow.
5. Window Sill Pumpkin and Candle Vignette
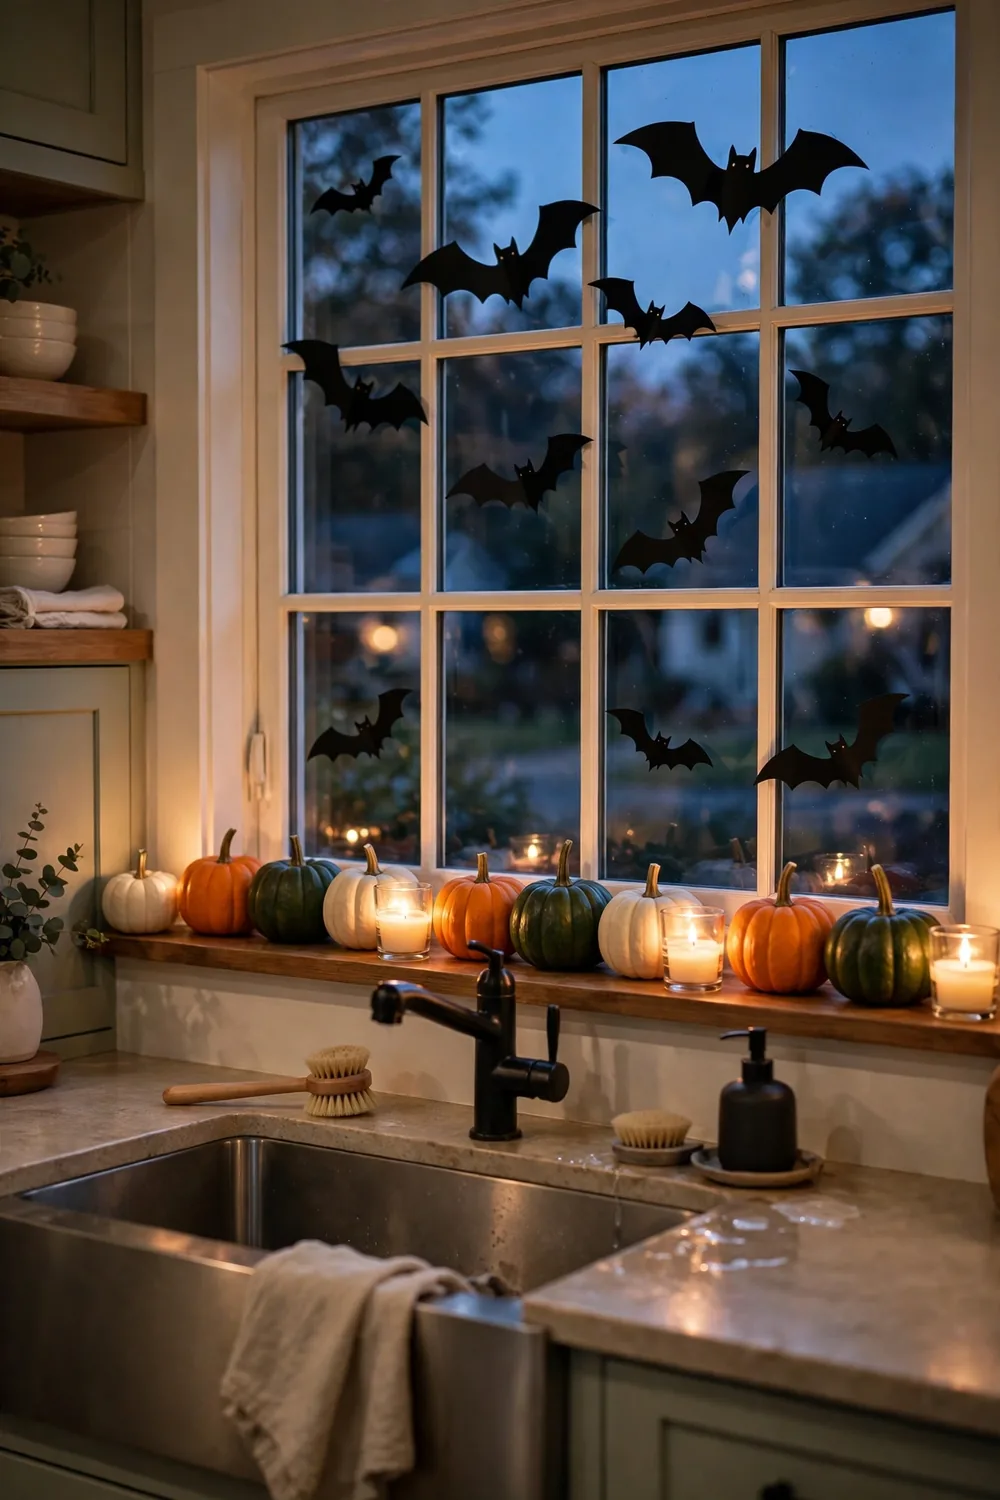
The window sill over the sink gets natural light all day and becomes a glowing display at night, which makes it prime real estate for Halloween styling. Line the sill with a row of mini pumpkins in alternating colors, white, orange, and deep green, and nestle small glass votives or LED candles between them.
Because this spot is visible from outside after dark, think of it as a two sided display. From inside you see the styled arrangement; from the street, neighbors see glowing silhouettes. Black paper bat cutouts taped to the glass complete the nighttime effect for almost no money. This is one of the simplest halloween kitchen decor ideas, and it takes under ten minutes.
Keep the arrangement shallow, a single row deep, so you can still reach the faucet and the window latch. If your sill is narrow, choose a low wooden tray to hold everything together and prevent pumpkins from rolling when the window opens.
Styling tips:
- Use LED candles on a dusk to dawn timer for a hands free glow every evening.
- Alternate pumpkin colors in a repeating pattern for a tidy, intentional rhythm.
- Tape bat cutouts to the outside of the glass so they read as clean silhouettes at night.
- Wipe the sill and glass first, since backlighting shows every smudge.
6. Fridge Door Styled with Mini Wreaths and Vintage Letter Boards
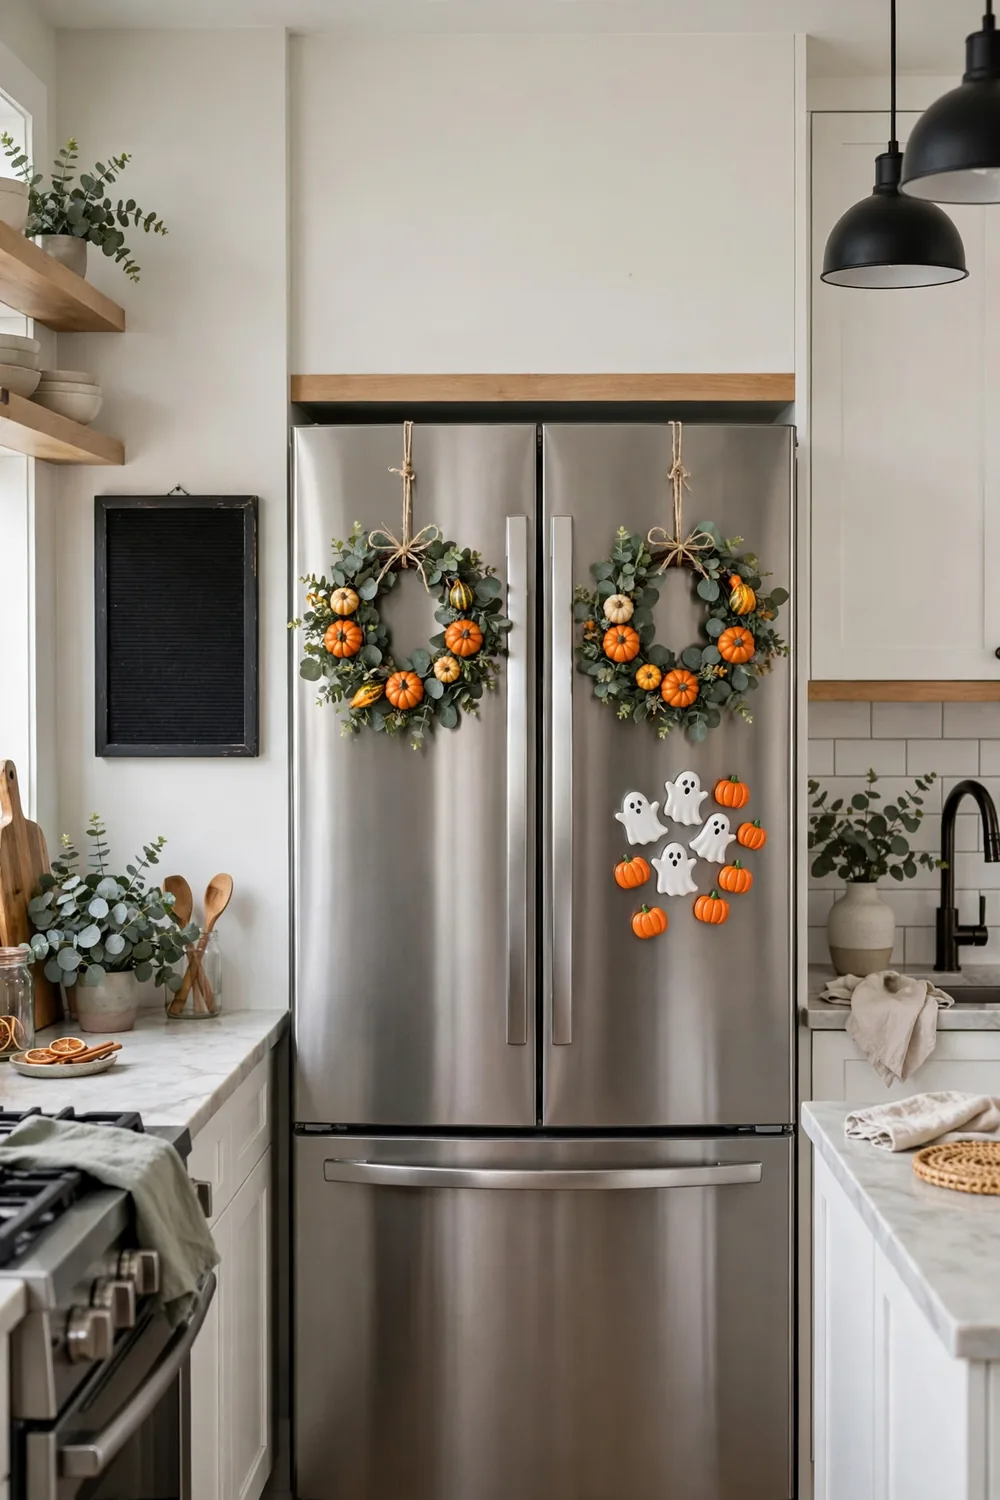
The refrigerator is the biggest flat surface in most kitchens, and a bare stainless door is a missed opportunity in October. Fridge styling is one of the quickest halloween kitchen decor ideas because the surface is already there. Start with two small matching wreaths hung from the top of each French door with magnetic hooks, grapevine or eucalyptus wreaths with a few mini pumpkins wired in look custom and cost little.
Between or below the wreaths, add a small vintage style letter board with a playful message like “eat, drink, and be scary” spelled out in white letters on black felt. Finish with a handful of oversized novelty magnets, ghost, bat, and pumpkin shapes, clustered in one corner rather than scattered. Clustering is the difference between styled and cluttered.
Keep the bottom half of the fridge clear for the daily rotation of school papers and grocery lists. Confining the Halloween styling to the upper doors keeps the display photogenic while the kitchen keeps functioning.
Styling tips:
- Use strong magnetic hooks rated for at least 3 pounds so wreaths never slide.
- Match the two wreaths exactly for a symmetrical, high end look.
- Change the letter board message weekly to keep the display feeling fresh.
- Group novelty magnets in one tight cluster instead of spreading them across the door.
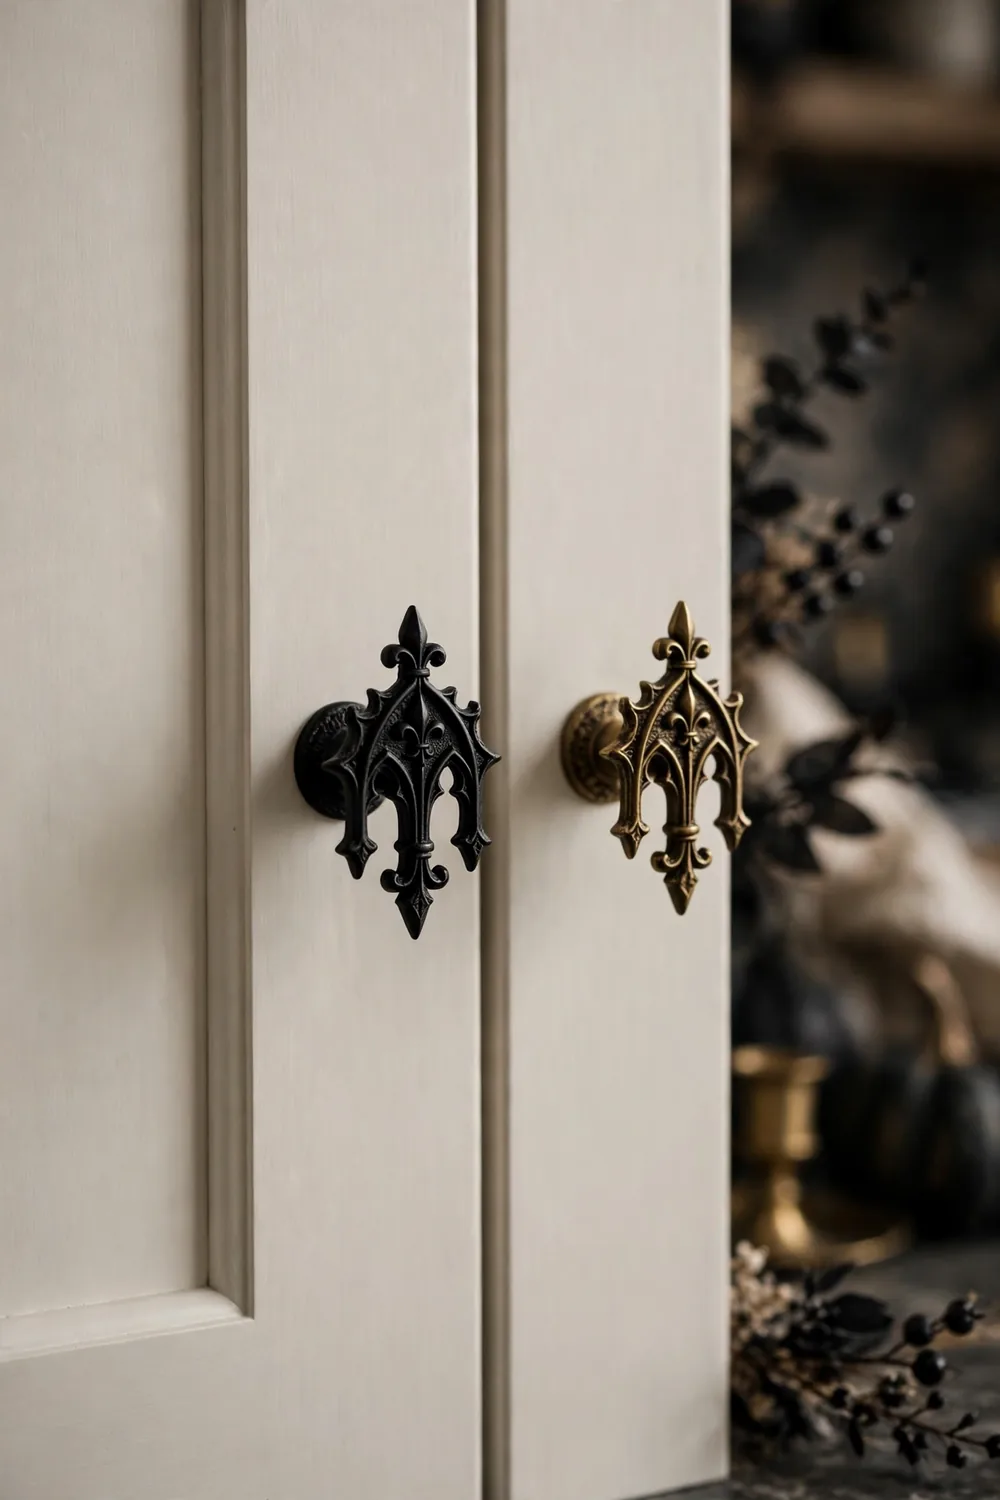
7. Cabinet Knob Swap for Instant Gothic Detail
Swapping cabinet knobs is the fastest architectural level change you can make for Halloween, and it takes about twenty minutes for a whole kitchen. Replace a few key knobs, on the island, the pantry, and the glass front uppers, with matte black, antique brass skull, or faceted black glass knobs. You do not need to change every knob; a deliberate mix reads as curated.
This trick works because hardware is jewelry for the kitchen. Dark, moody knobs against light cabinets create instant contrast that feels Halloween appropriate without a single pumpkin in sight. It is one of the most underused halloween kitchen decor ideas, and guests always notice it before they can name what changed.
Store the original knobs in a labeled bag taped inside one cabinet so the swap back in November takes minutes. If you love the moody hardware, keep it through the holidays; black knobs pair beautifully with Christmas greenery too.
Styling tips:
- Swap knobs on the island and pantry first for maximum visual impact per knob.
- Keep the screw size consistent, most kitchen knobs use standard 8-32 screws.
- Mix two finishes, like matte black and aged brass, for a collected, designer feel.
- Bag and label originals immediately so the November switch back is painless.
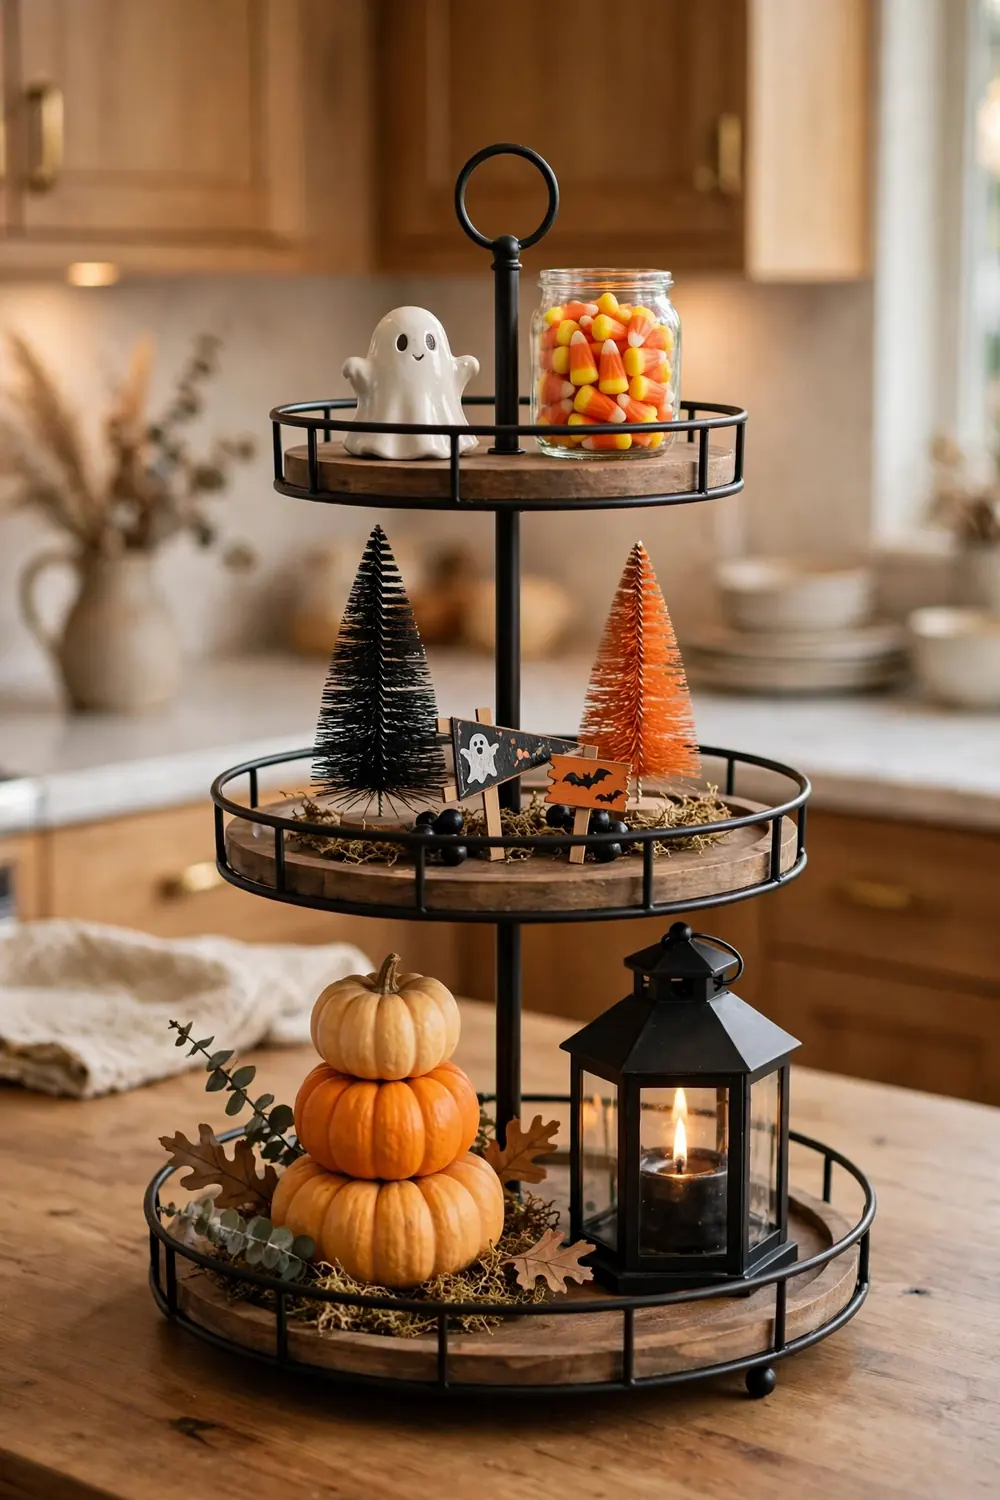
8. Tiered Tray Halloween Vignette
The tiered tray is the workhorse of seasonal kitchen styling because it concentrates a whole vignette into one square foot of counter. Build yours in layers: the bottom tier holds larger pieces like a small pumpkin stack and a black candle lantern, the middle tier gets mini signs and bottle brush trees in black and orange, and the top tier finishes with tiny details like candy corn in a shot glass or a miniature ghost figurine.
The secret to a great tiered tray is varying heights within each tier so nothing sits in a flat line. Use small wood risers, overturned ramekins, or stacked coasters to lift shorter pieces. Stick to three colors maximum across the whole tray, black, orange, and cream is foolproof.
Place the finished tray on the island, a bar cart, or the coffee station where it acts as a finished focal point. Because everything lives on the tray, you can lift the entire Halloween display off the counter in seconds when you need the space, then set it right back.
Styling tips:
- Limit the palette to three colors so the small scale does not look busy.
- Vary heights with risers on every tier for a professional, layered look.
- Include one glowing element, like a fairy light bundle or LED candle, per tray.
- Photograph the tray before dismantling so you can rebuild it next year in minutes.
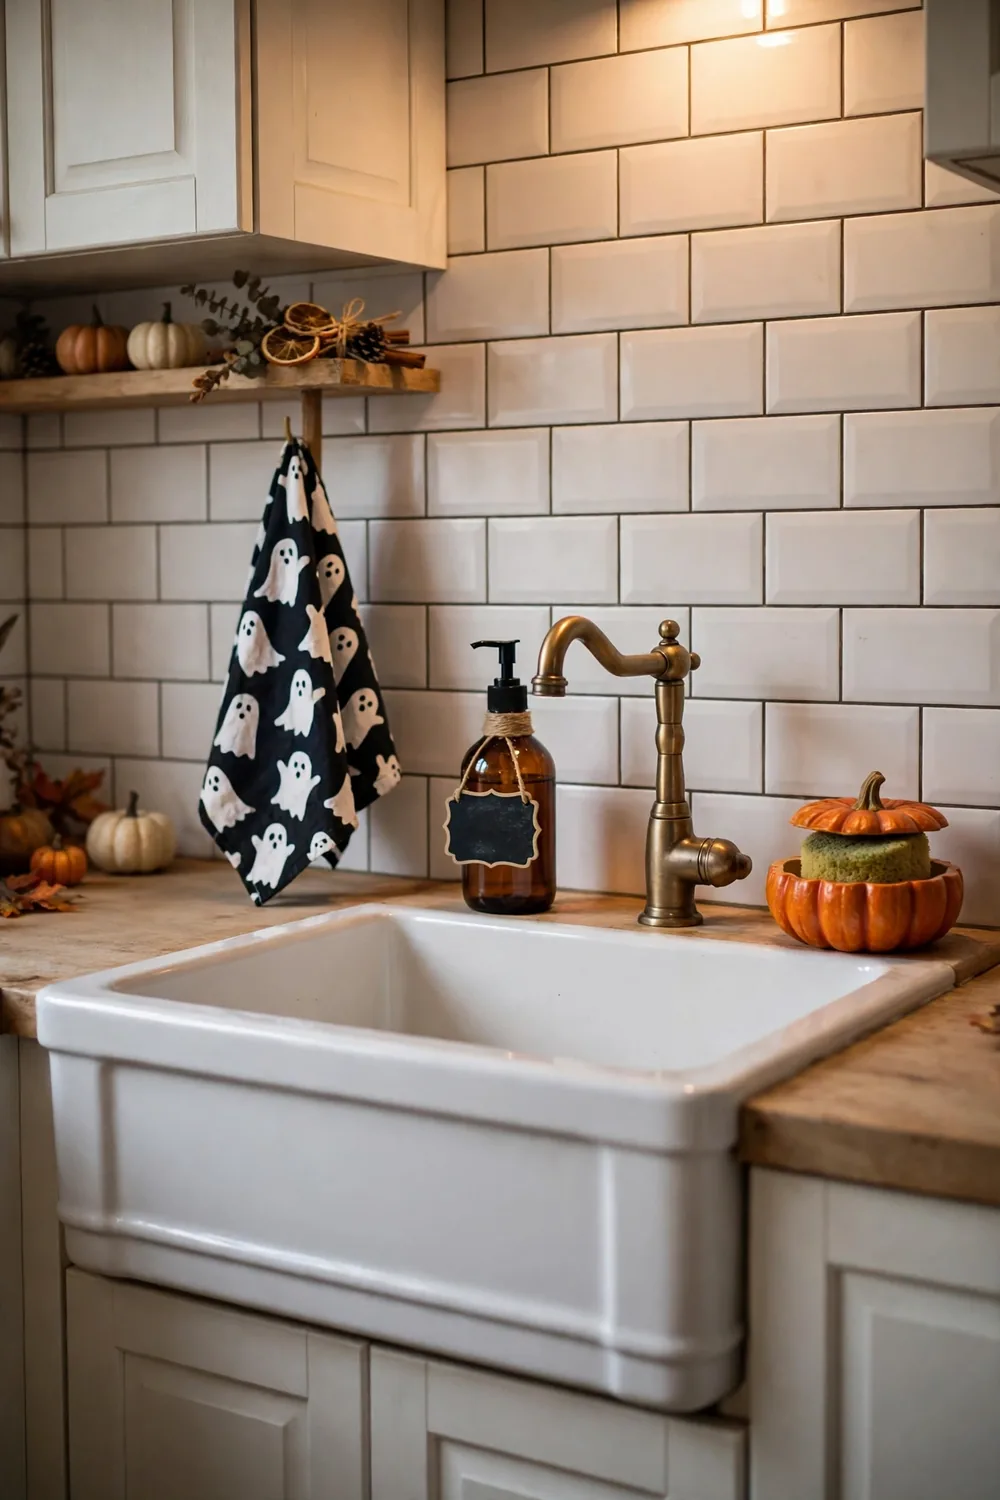
9. Sink Vignette with Ghost Towels and Seasonal Soap
The sink area gets styled by default in every kitchen, so give it a deliberate Halloween moment instead of leaving it as an afterthought. Hang a ghost or bat print hand towel on the oven handle or a hook beside the sink, swap the soap dispenser for an amber glass bottle with a chalkboard label, and set a small pumpkin shaped dish by the faucet to hold rings or a sponge.
These are the details guests actually touch and use, which makes them memorable. A pumpkin spice or smoked cedar hand soap adds scent to the styling, engaging one more sense. Keep a second, plain hand towel tucked in a drawer for heavy duty drying so the pretty towel stays pretty.
This vignette costs almost nothing if you already own a seasonal towel, yet it signals that the whole kitchen was styled with care. It is the kind of finishing touch that elevates all your other halloween kitchen decor ideas.
Styling tips:
- Choose an amber or black soap dispenser that looks good enough to leave out year round.
- Fold the decorative towel in thirds and hang it centered for a crisp, styled look.
- Add a seasonal scent, like apple cider or clove, through the hand soap.
- Keep the sponge hidden inside the pumpkin dish so the vignette stays tidy.
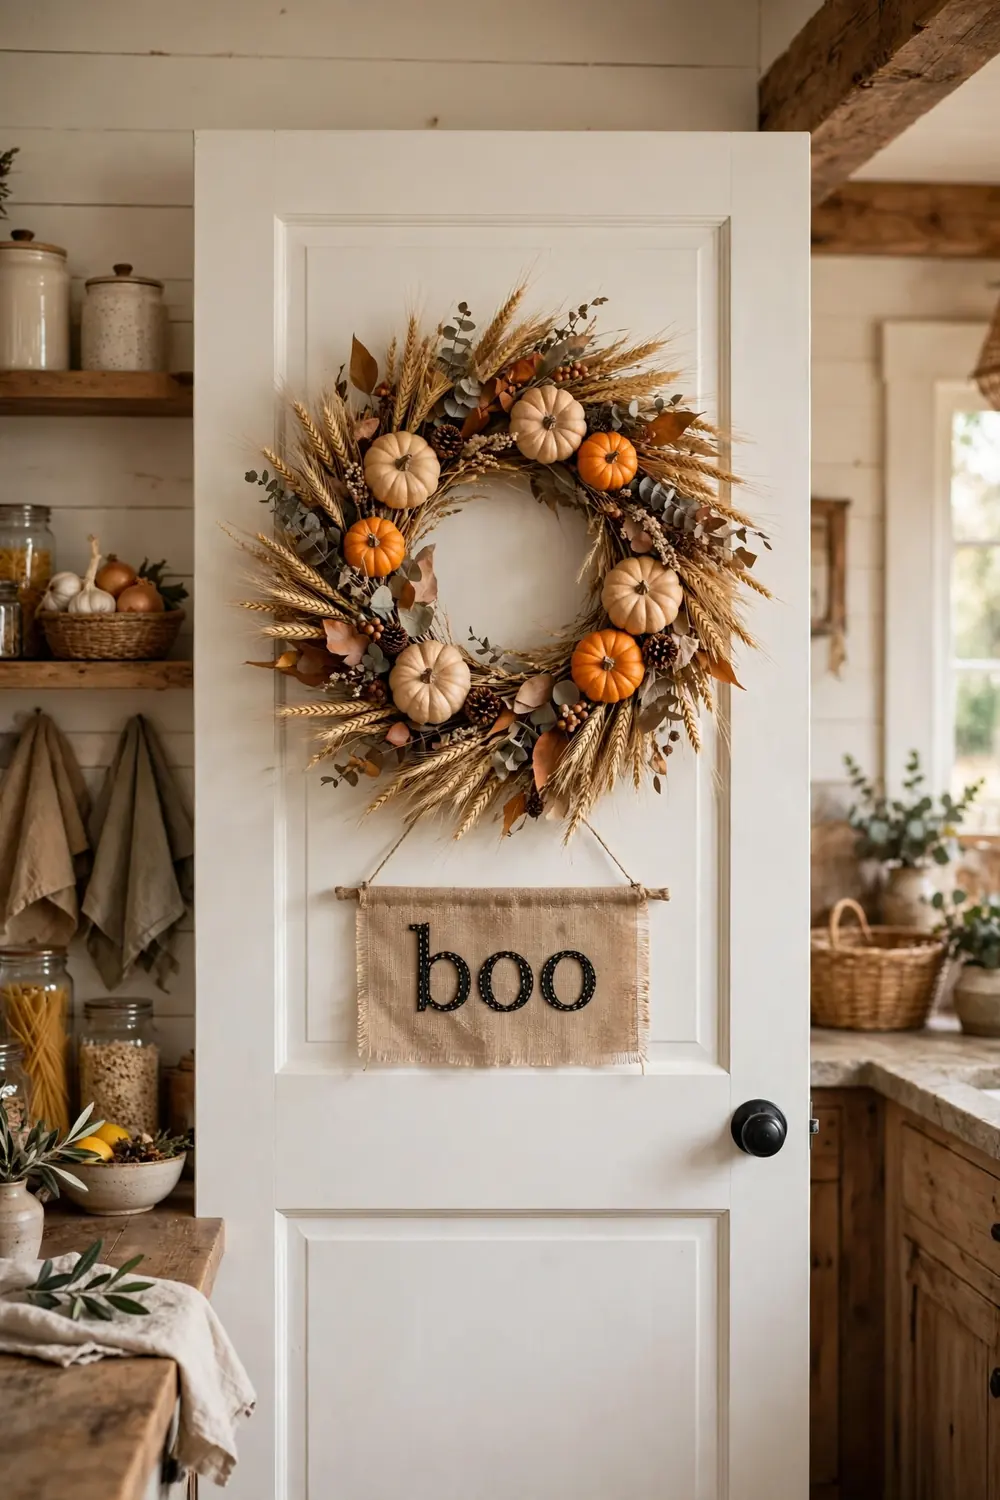
10. Pantry Door Wreath and Banner Combo
The pantry door is a vertical billboard most kitchens ignore. Hang a full sized wreath at eye level, dried wheat and mini pumpkins for farmhouse kitchens, or an all black wreath with purple accents for gothic glam. Center it carefully; a crooked wreath is all anyone will see.
Below or above the wreath, hang a short fabric banner with a Halloween word like “spooky,” “boo,” or “gather.” Use an over the door hook or removable adhesive so the door’s finish stays pristine. The wreath plus banner combination gives the pantry the same dressed up treatment as a front door, which makes the kitchen feel fully committed to the season. Treat the pantry like a front door and it becomes one of the highest impact halloween kitchen decor ideas in the room.
If your pantry is a walk in with no real door face, style the nearest tall cabinet or the side of the fridge instead. The principle is the same: one strong vertical moment anchors the room.
Styling tips:
- Hang the wreath so its center sits at average eye level, about 60 inches from the floor.
- Use an over the door wreath hanger in a matching finish to avoid adhesive failures.
- Choose banner fabric, like burlap or canvas, that echoes your kitchen textiles.
- Fluff wreath branches outward before hanging so it looks full from every angle.
11. Breakfast Nook Spooky Tablescape
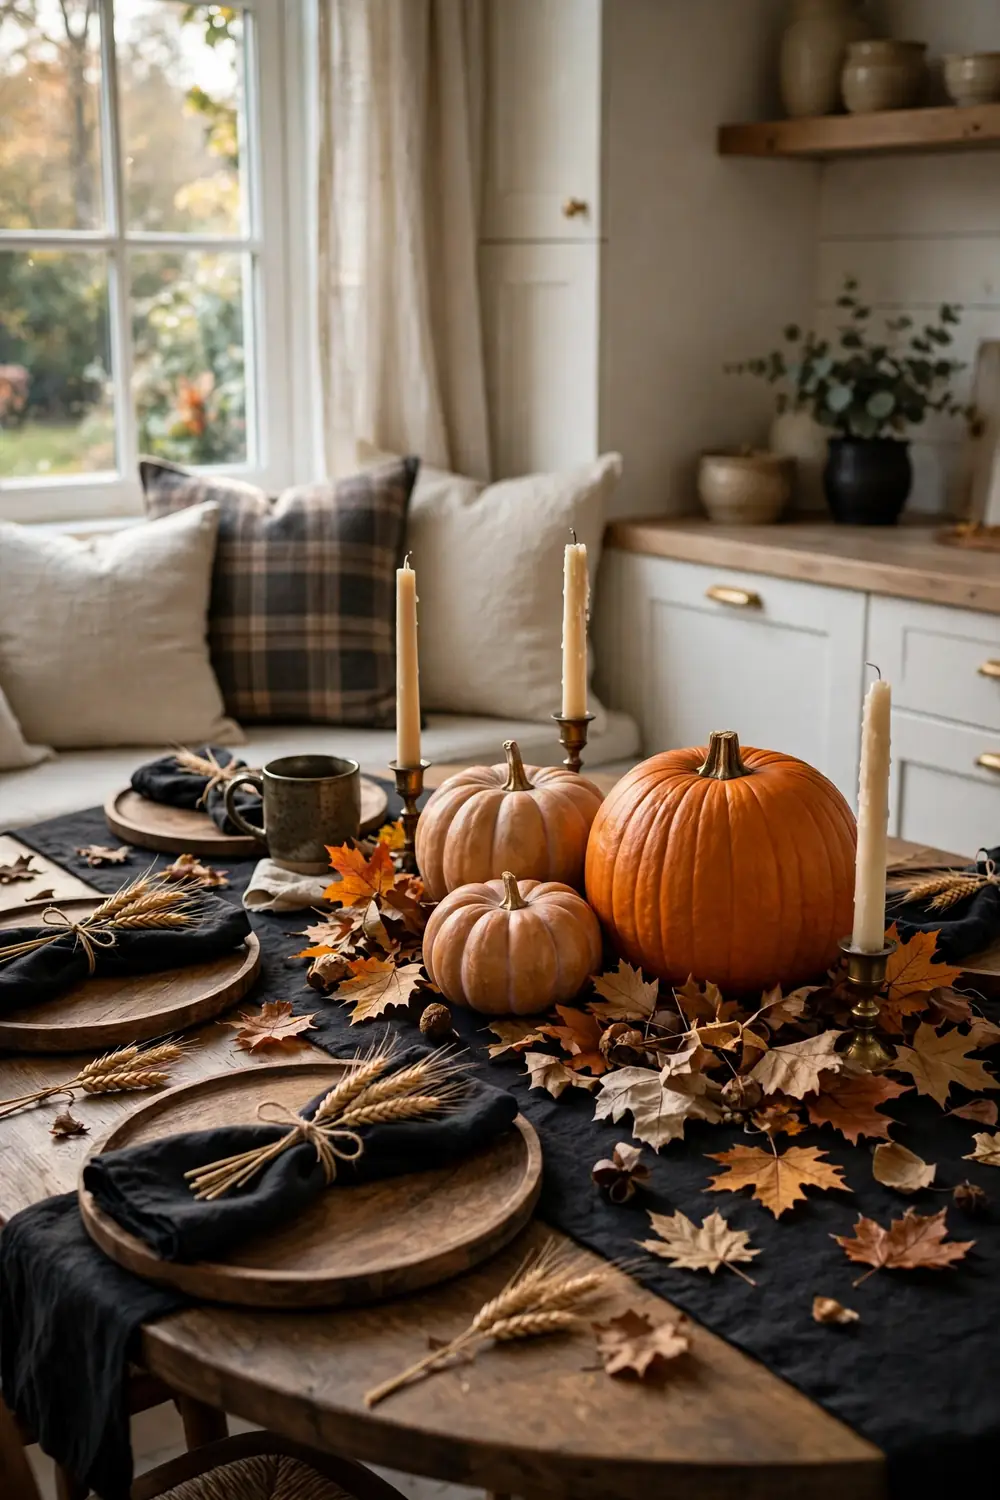
If your kitchen has an eat in nook or a small cafe table, dress it like a miniature Halloween dinner party that stays up all month. Start with a dark table runner, layer a round wood charger under everyday plates, and add black linen napkins tied with twine and a sprig of dried wheat. The table becomes a styled scene even when no one is eating.
The centerpiece can be simple: a cluster of three pumpkins in graduated sizes, a few taper candles, and scattered faux autumn leaves. Because the nook is a contained zone, you can go slightly bolder here than on work counters. For a full party ready version, borrow place setting ideas from our halloween table decor ideas and scale them down to the nook’s footprint.
Keep two chairs pulled in and dressed with a throw pillow each so the nook invites someone to sit down with coffee and a book. A styled but usable table is the goal; if the centerpiece blocks conversation across the table, it is too tall.
Styling tips:
- Keep the centerpiece under 14 inches tall so conversation flows across the table.
- Use washable dark linens since the nook table sees daily meals and spills.
- Repeat one motif, like bats or moons, on napkins and the runner for cohesion.
- Leave the table set all month; it doubles as decor and encourages family meals.
12. Backsplash Spider Web Decals
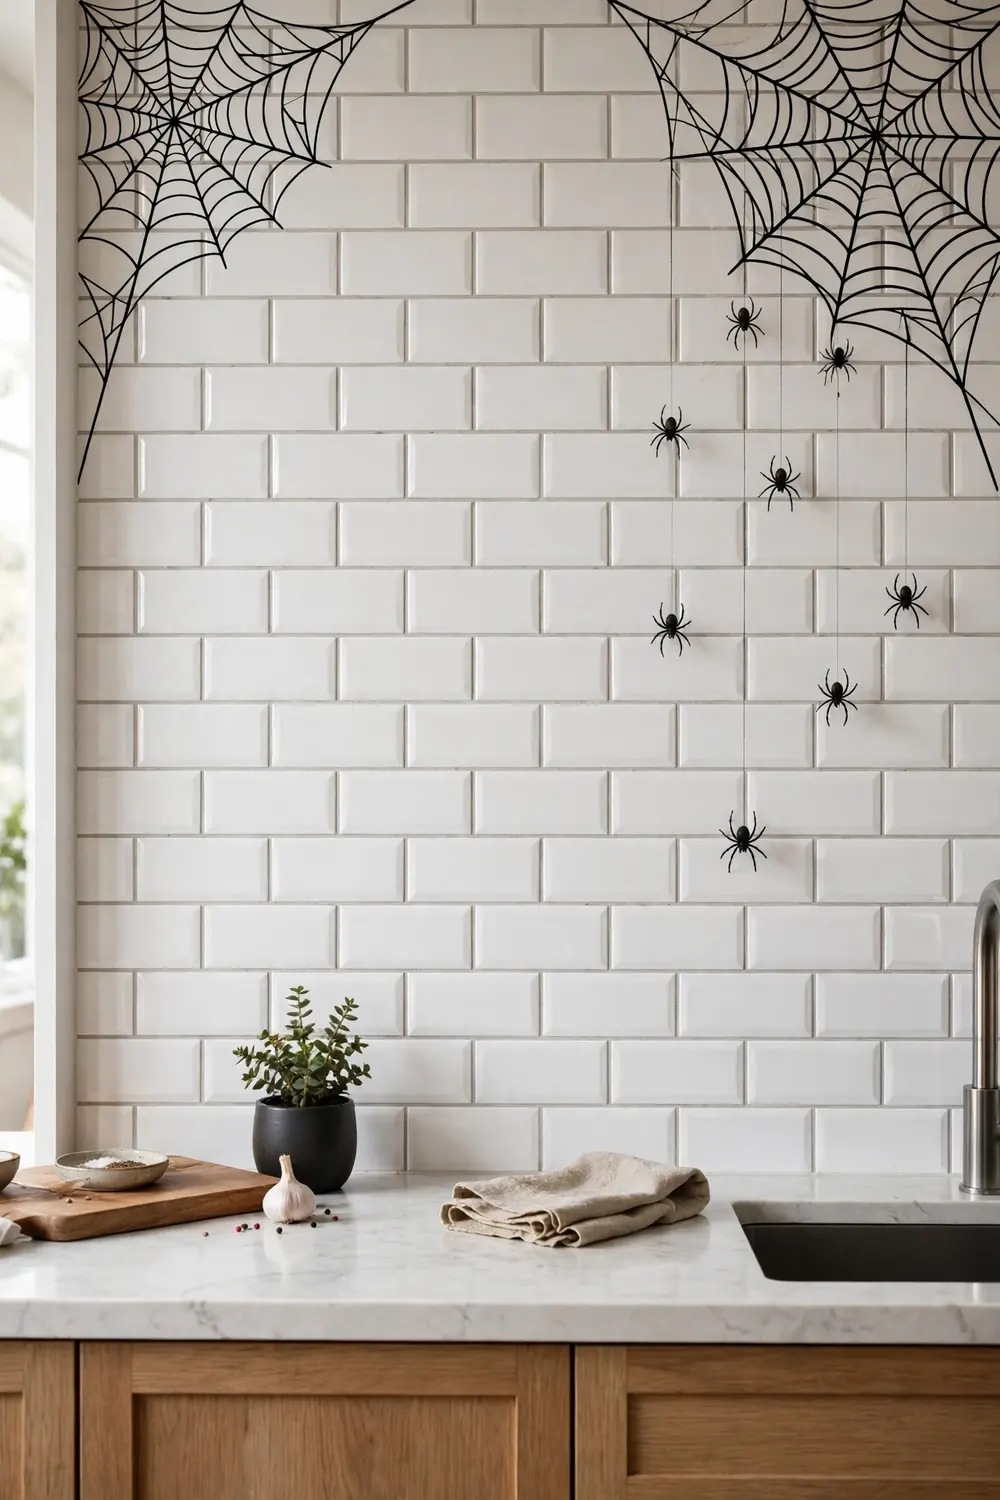
The backsplash is a big, flat, wipeable surface that takes removable vinyl decals beautifully. A set of spider web corner decals with a few dimensional spiders turns an ordinary tile backsplash into a Halloween feature wall in about fifteen minutes. Because quality vinyl is removable, this is completely renter friendly.
Place webs in the upper corners of the backsplash where they frame the cooking zone without interfering with splatter zones. Black webs pop on white or light tile; white or silver webs show up best on dark tile. A few spiders trailing down toward the counter on invisible thread add a three dimensional scare.
This is one of the boldest halloween kitchen decor ideas visually, yet it peels off in November with no damage. Renters especially love these removable halloween kitchen decor ideas because nothing is permanent. Test one decal behind the coffee maker first to confirm it adheres to your tile finish and removes cleanly.
Styling tips:
- Choose high quality removable vinyl rated for smooth tile, not permanent adhesive.
- Place decals high on the backsplash, away from direct cooking splatter.
- Match decal color to your tile for maximum contrast, black on light, white on dark.
- Remove decals slowly at a low angle in November to protect grout lines.
13. Pendant Lights Draped with Gauze and Hanging Bats
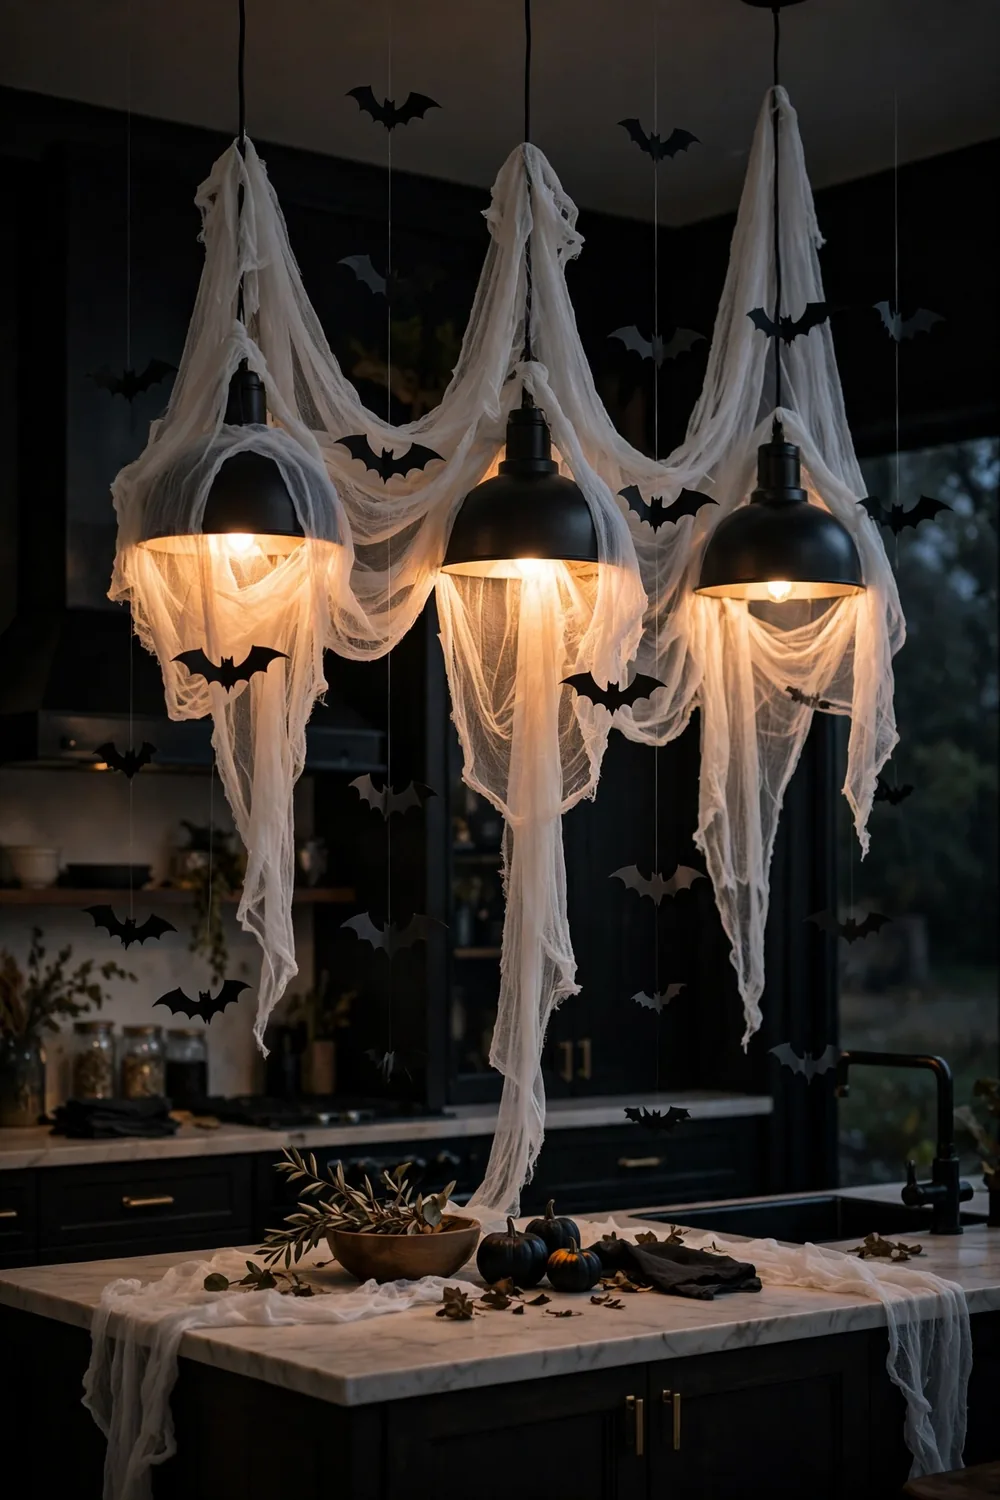
Pendant lights over the island or sink are natural hanging points for Halloween drama. Drape lengths of cheesecloth or white gauze loosely over and between the pendants so the fabric catches the light and glows. Then hang a few lightweight paper bats from the gauze on clear thread at staggered heights.
The effect is best in the evening when the pendants are on: the gauze diffuses the light into a soft, haunted glow and the bats cast moving shadows. Keep all fabric and paper at least 12 inches from any bulb, and use LED bulbs that run cool. Safety first, always, with anything hung near light fixtures.
This styling takes the vertical space above the island that usually goes undecorated and turns it into the room’s most atmospheric feature. When the season ends, the gauze comes down in one pull and the bats store flat in an envelope for next year.
Styling tips:
- Use only cool running LED bulbs when draping any fabric near fixtures.
- Hang bats at three different heights for a natural, swarming effect.
- Secure gauze with small clear zip ties so it cannot slip onto hot bulbs.
- Keep fabric ends above head height so no one walks through the display.
14. Coffee Station with Pumpkin Spice Styling
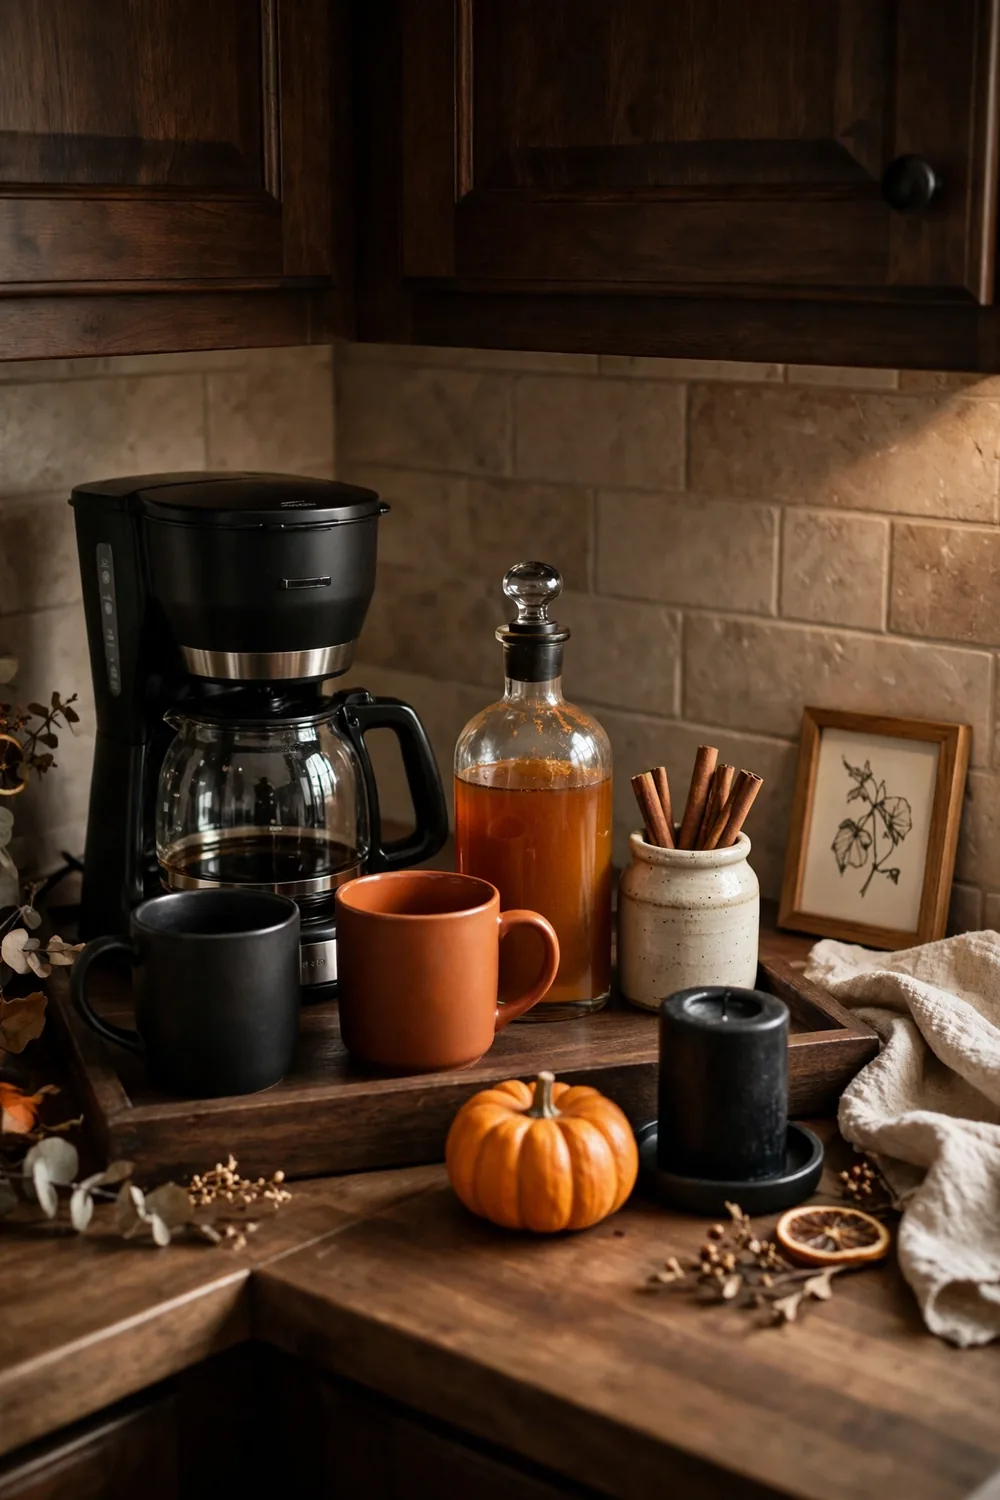
The coffee station is a daily ritual spot, which makes it a perfect candidate for Halloween styling you will actually enjoy every morning. Corral the coffee maker, mugs, and canisters on a dark wood or slate tray, then add a small pumpkin, a black candle, and a tiny framed art print with a coffee themed Halloween quote.
Swap in seasonal details that earn their keep: a pumpkin spice syrup in an apothecary style bottle, cinnamon sticks in a small crock, and mugs in burnt orange or matte black. Label the canisters with chalkboard tags reading “witches brew” for the coffee and “magic beans” for good measure. Functional and festive is the sweet spot for halloween kitchen decor ideas that live on work surfaces.
Because this station gets used daily, keep the styling tight to the tray so wiping the counter around it stays easy. One small bouquet of dried wheat or dark foliage in a bud vase finishes the look without stealing counter space.
Styling tips:
- Keep every styled item on one tray so daily counter wiping stays simple.
- Use apothecary bottles for syrups; they look intentional and pour cleanly.
- Rotate two or three seasonal mugs so the display feels alive, not staged.
- Add one dried floral stem for height without sacrificing counter space.
15. Dish Towel and Pot Holder Seasonal Textile Swap
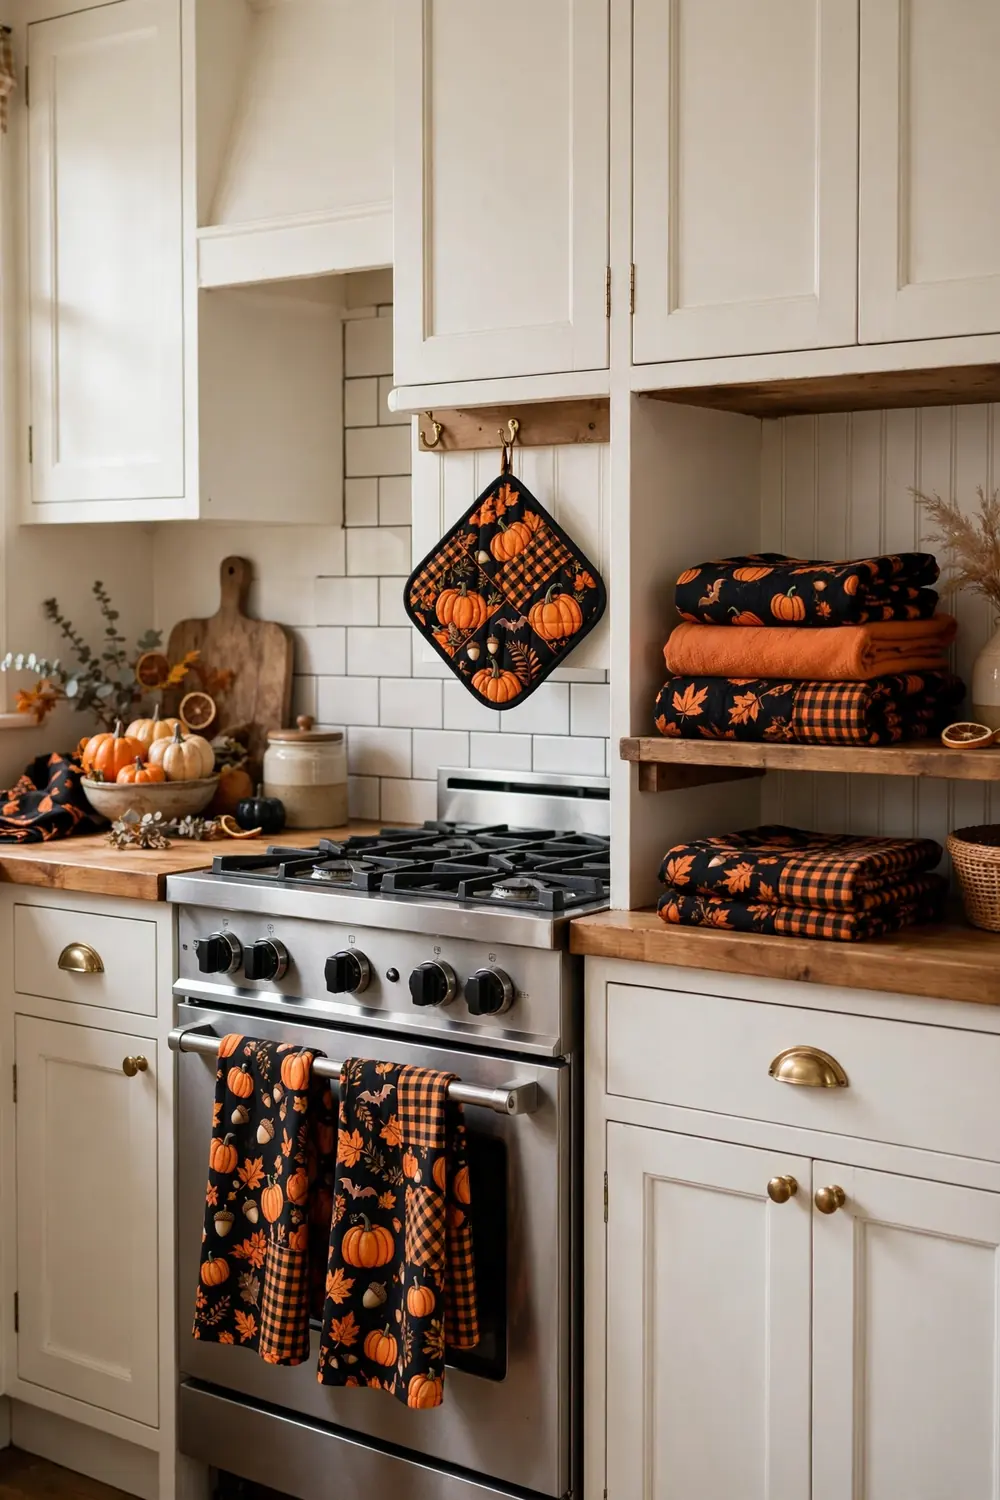
Never underestimate textiles. Swapping everyday dish towels, pot holders, and the oven mitt for Halloween prints is the cheapest full room refresh on this list, and it touches every work zone in the kitchen. Textile swaps are the most budget friendly halloween kitchen decor ideas, and they work in every kitchen style. Choose one pattern family, black and orange buffalo check, subtle bat prints, or vintage Halloween illustrations, and repeat it across all the textiles for a coordinated look.
Layer the swap: a patterned towel on the oven handle, a matching pot holder hung on a hook by the stove, and a folded set stacked in an open cubby or basket. Textiles soften all the hard surfaces in a kitchen, so this one change shifts the whole room’s temperature toward the season. Buy decent cotton or linen versions and they will last for many Octobers.
Store the off season textiles in a labeled bin with the rest of your Halloween decor so the swap takes five minutes next year. This finishing layer ties together every other vignette in the room, which is why stylists treat textiles as the final step in seasonal decorating.
Styling tips:
- Stick to one pattern family across all textiles for a pulled together look.
- Invest in cotton or linen; cheap thin towels look flat and wear out fast.
- Fold and stack spare seasonal towels where they are visible, like an open shelf.
- Pack textiles with the Halloween bin, labeled, for a five minute swap next year.
Halloween Kitchen Color Palettes That Always Work
If you are unsure which colors to buy, start with a proven palette and let it guide every purchase. The table below pairs classic and fresh color stories with the kitchen styles they suit best, so your halloween kitchen decor ideas feel designed rather than assembled.
| Palette name | Colors | Best for | The vibe |
|---|---|---|---|
| Classic Harvest | Burnt orange, black, cream | Farmhouse and traditional kitchens | Warm, nostalgic, welcoming |
| Gothic Glam | Black, deep purple, antique gold | Modern and moody kitchens | Dramatic, luxe, grown up |
| Ghostly Minimal | White, soft gray, matte black | Minimalist and Scandinavian kitchens | Calm, chic, understated |
| Candy Bright | Orange, lime green, purple | Family kitchens with kids | Playful, fun, high energy |
| Orchard Noir | Burgundy, forest green, brass | Traditional and eclectic kitchens | Rich, moody, harvest elegant |
Mistakes to Avoid with Halloween Kitchen Decor
Even great ideas fall flat when a few common pitfalls sneak in. Run through this quick table before you call the room done; fixing these takes minutes and the difference is dramatic.
| Mistake | The fix |
|---|---|
| Decorating every single surface | Leave at least one third of counters clear so the kitchen still works for cooking. |
| Mixing three or more Halloween styles | Pick one mood from the planning table and remove anything that does not fit it. |
| Using real candles near prep zones | Switch to flameless candles with timers anywhere near food, fabric, or traffic. |
| Blocking task lighting with decor | Keep garlands and gauze away from under cabinet lights and range hoods vents. |
| Forgetting the kitchen still needs cleaning | Corral vignettes on trays so you can lift the whole display to wipe counters. |
| Buying everything in one trip | Style with what you own first, then fill only the real gaps so nothing feels forced. |
Final Thoughts
These 15 halloween kitchen decor ideas all share one principle: style the spots you already use, and let the room’s daily rhythm do half the work. A candlelit island, a styled shelf, and a seasonal towel swap deliver more atmosphere than a dozen random props scattered across the counters. Pick the three or four ideas that fit your kitchen’s layout and your chosen mood, execute them well, and the whole room will feel ready for October. When the last trick or treater has gone, pack the pumpkins away and start planning the next transformation with our christmas kitchen decor ideas, because a kitchen this well styled deserves a second act.